
In my Atari world, the Video Computer System (VCS) is not my primary focus of the Atari computers I collect. However, this is likely the most recognizable Atari for most people. It is the unit that brought the arcade home to so many back in the late 70’s, early 80’s. It was the system you went to when you ran out of quarters for the real arcade games at the mall. I should note that for all the production years (1977-1992) of the 2600 VCS, I never personally owned one. My exposure to this game console was through friends and acquaintances I would visit and/or borrow to play on this device.
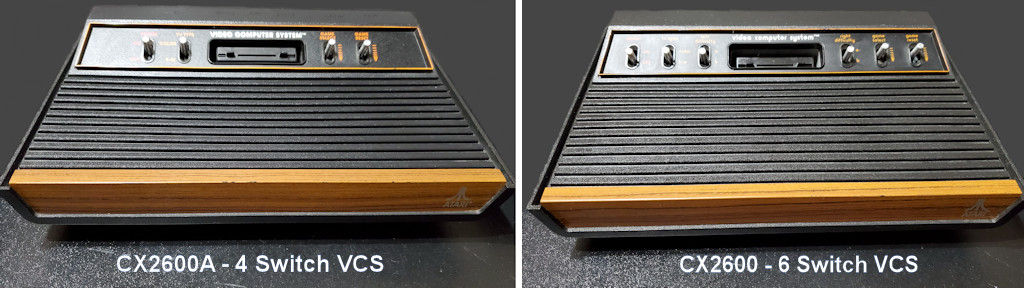
At present, I have three Atari 2600 series VCS units that I collected back in the late 1990’s when you could pick one up at a Goodwill or garage sale for a couple of dollars including some games. How times have changed. Specifically, my collection consists of one CX2600 6 switch VCS, vintage 1980. This revision is known as the “light-sixer” and mine was manufactured in Hong Kong. My other two VCS units are the 4 switch CX2600A series manufactured in Taiwan in 1982.
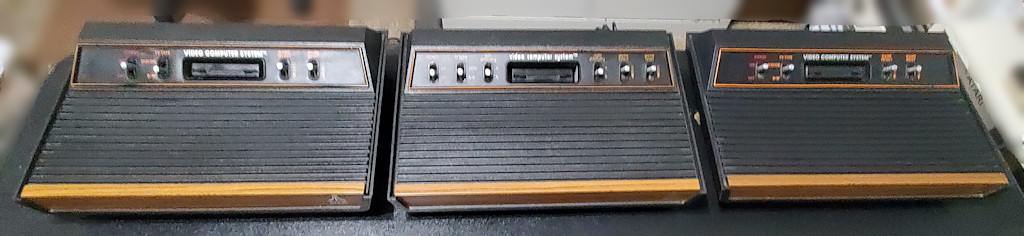
For the last ten to fifteen years, I’ve had my light-sixer, and one four switch unit stored in a box up in the attic. Honestly not the best place to store electronics as it gets really hot and really cold up there and can wreak havoc on the components and the plastic enclosures in some cases. I didn’t even realize they were up there until this past Christmas (2024) while bringing down all the holiday decorations, I needed to move some boxes around and got curious of what was in some other boxes since I was up there. Fortunately, it does not appear to have been too problematic in the case of my VCS units. My Compaq server I put up there shortly after we moved into this house in 1997 did not fare so well with the front plastic cover becoming so brittle that the slightest touch has it crumbling into pieces. I don’t dare connect any power to this thing until I can fully inspect the inside and fix (replace) all the components that I’m sure are trashed.
Not stored in the attic are some forty+ game cartridges and one 4 switch 2600. I’ve had those stored in a storage bin in my home office. So, once I had brought these two 2600’s down, I decided to go through all three in my collection to get them freshened up and working as they did all those years ago. The pictures you see above are the units cleaned up and polished. For reference, 303 Aerospace Protectant is the cats’ meow for making old retro equipment look like new. Well worth the cost.
A CX2600A Maintenance Session
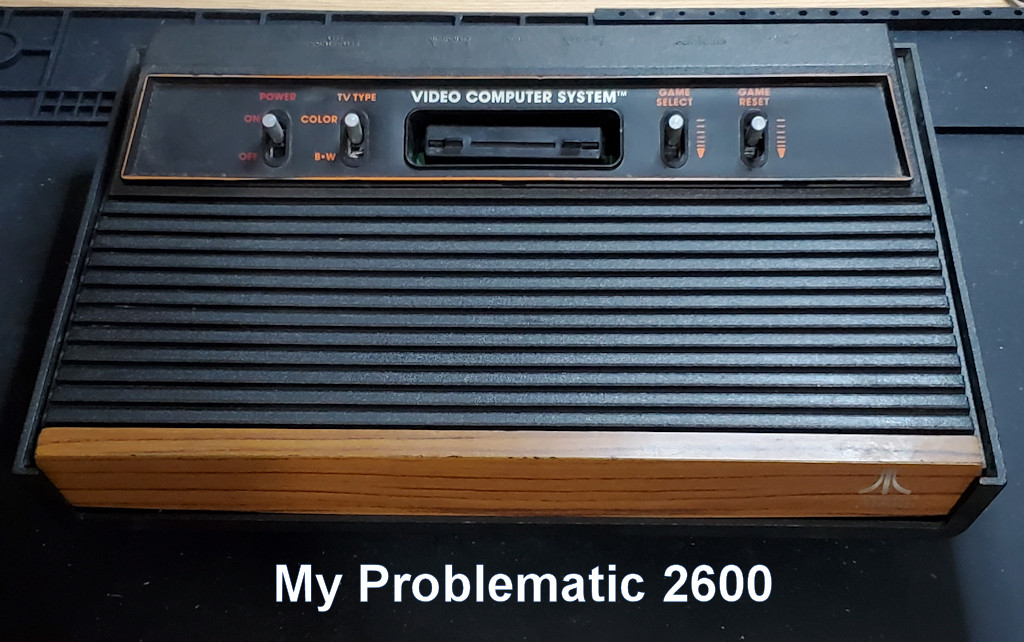
During my review of the three 2600 units, I found that my 4-Switch unit from the attic would not reliably load and play a few game cartridges I used for testing. The Atari Combat game cartridge (that seems to come with every 2600 sold) would load up properly 75% of the time and be played without issue. Frogger would work if you put it in just the right way. And Space Invaders would consistently throw garbage on the screen and not work at all. Beyond the standard cleaning of the cartridge connections, it was time to crack this unit open and take a look at the internals to see if something else is afoot.
Before I get started, I should point out that the CX2600A is a simple single board machine that lends itself well to the beginning electronic hobbyist to work on. Most of the components are still readily available today and the board itself is designed to make soldering of components relatively simple. Console5.com sells a 2600 (all models) maintenance kit for less than $10 that includes the capacitors and regulator one typically would replace. Depending on your board revision (mine is rev. 13) Console5 also provides technical bulletin replacement parts as needed.
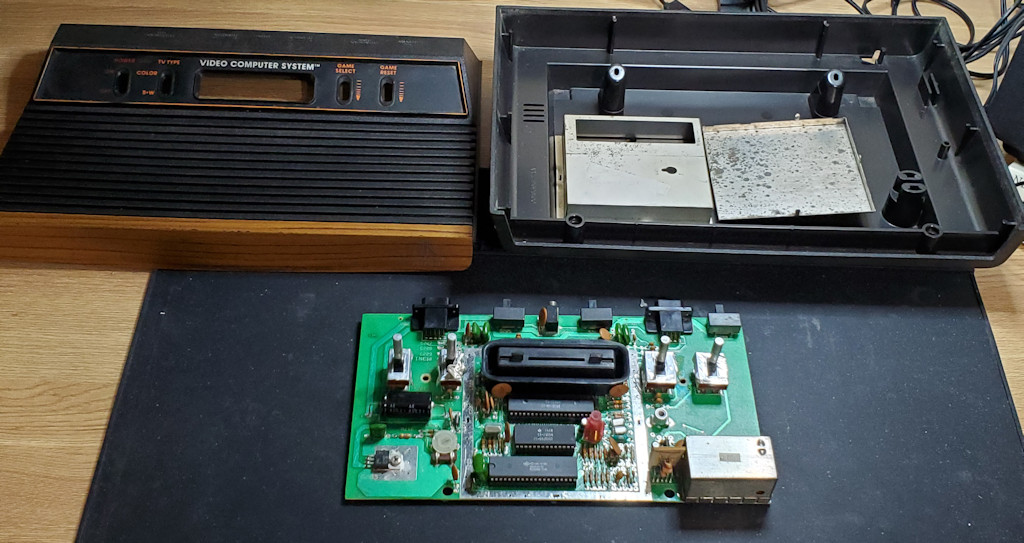
The above picture shows all the parts that make up the CX2600A series VCS. This is the most popular unit you will find sold on eBay or other sites and there are a lot of them out there. It’s simple to disassemble and do repair/upgrade work and then put back together again. And yes, I said upgrade as you can put a UAV (see my other posts) in this unit. Something I plan to do in the future.
Now it is on to replacing a few capacitors and a power regulator.
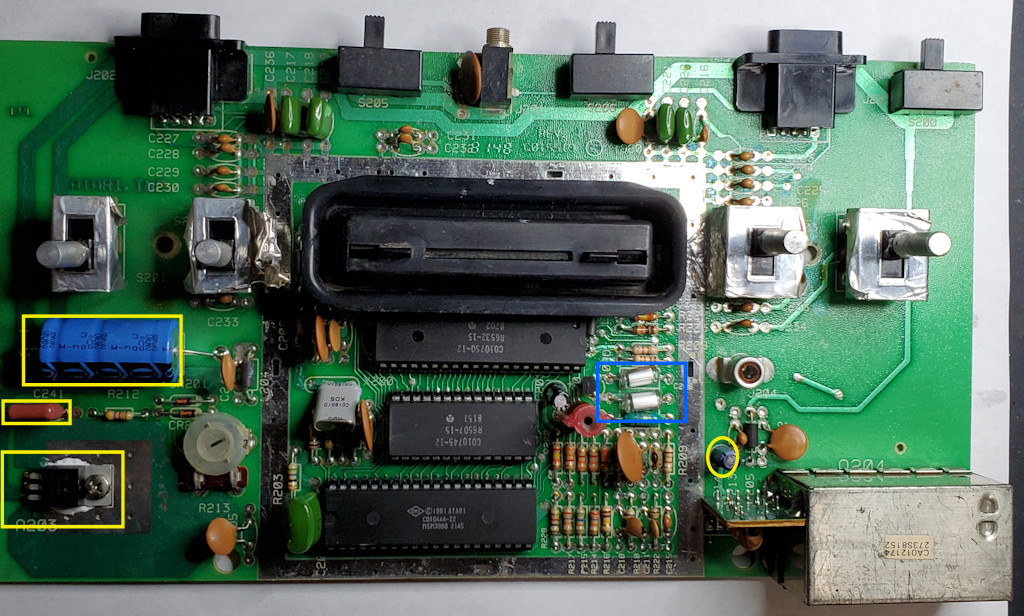
The items highlighted in yellow is what I replaced on this first run. That included two electrolytic capacitors, and one chicklet capacitor. I also replaced the power regulator highlighted in the lower left side of the board. I did not replace the two polyester capacitors highlighted in the blue rectangle as I was not having any audio issues from this unit. These polyester capacitors are heat sensitive and I see no need to replace something that ain’t broke with a part that is fragile as these to install. If things stop working in the future, I can revisit at that point. I did resolder the cartridge slot connections on the board just in case there were any solder cracks from years of use and flexing of the board.
Overall, the components I replaced with the possible exception of the two electrolytic capacitors did not need to be touched. My cleaning of the cartridge slot connectors with alcohol was most likely the only thing I really needed to do to address my game issues. But with this all done I’m now prepped to look at upgrading this 2600 with a UAV (Ultimate Atari Video). When these consoles were made, they used standard RF for channels 2 or 3 on your TV. Most modern TVs made today don’t support this type of connection and it’s even becoming more common that the TV doesn’t even have a cable RG59 connection. It’s all HDMI. UAV offers up composite video and s-video which provides a simpler path to convert to HDMI if that is all your TV has. But for my old displays I have lying about, connecting to composite will offer a much better picture than the old RF analog signal from 40 years ago.
Oh, and there is one other issue to address should I install a UAV in my 2600, and that is the audio out. UAV does not do anything with audio, it is just a video signal processor. Guess I will look up the notes on how I provide a means of bringing the audio out of the 2600 so that it works on more modern TV’s. Fun stuff!