The Atari 800 is the computer which I first saw my brother David use that inspired me to jump on to the Atari bandwagon back in the 80’s if memory serves.
I picked up my Atari 800 sometime in the late 90’s I think, and never really did much with it as I already was using my 800XL and 65XE computers. So, it with other Atari computers I’ve collected sat on a shelf in my closet for years. During the 2020 pandemic lockdown, I had time to pull all my Atari computers and peripherals out of storage and test their workings, and to my surprise, the 800 powered up without any issues but one…
A common problem for many of the Atari 800 computers with the mechanical keyboard is the keys binding up and sticking when attempting to type. The issue has to do with the key sleeves splitting at the corners. Some keys such as the QWERTY row were more likely to bind and stick down when pressed just due to the angle of your keystroke. As such, I really couldn’t use the keyboard on this computer for any serious typing, and at forty plus years old, there are no replacement keyboards available.
Then as I was reading my social media Atari group feeds, I came across some other users that implemented a solution via the help of a 3D printer to fix their 800 keyboard woes much the same as mine. You gotta love technology of today that fixes issues with that old technology you grew up with. And for $20 an industrious individual printed a solution for my keyboard woes. Below I walk through the solution implemented to fix my keyboard.
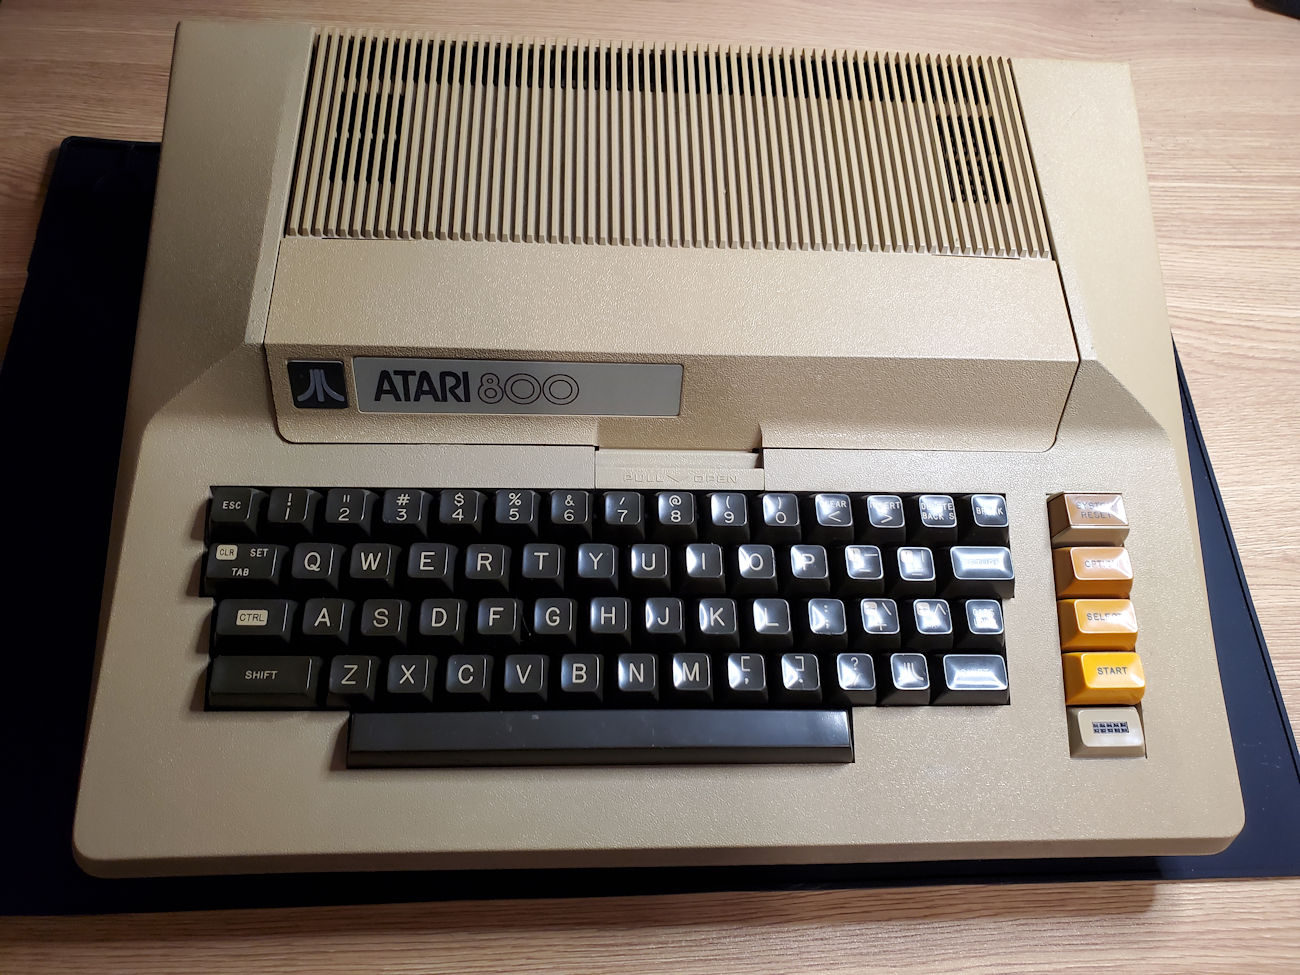
The Atari 800 is a handsome looking machine even by today’s standards. The keyboard was much like an electric typewriter of the day and was/is a pleasure to type with. This particular Atari 800 has the Hi-Tek mechanical keyboard. There was also a Mitsumi mylar based keyboard used with the 800 in other production units.
For this repair, we will need the 3D printed collars and some UV activated superglue. You will see in the upcoming photos how the 3D printed collars provide the fix for this keyboard.
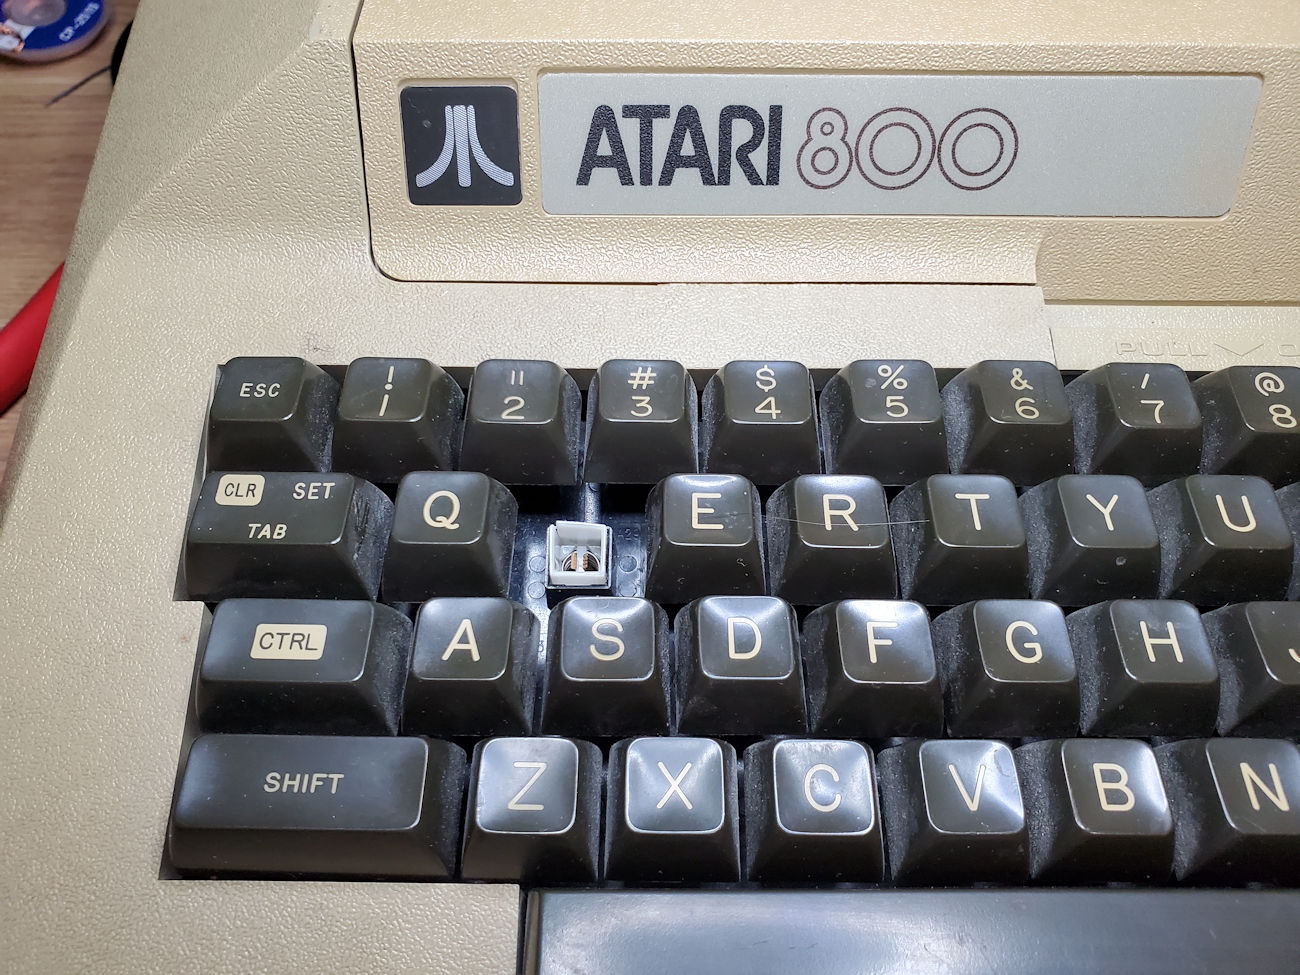
Once you get past looking at the 40 years of dust and debris, you will see that I have removed the W key. See where the plastic sleeve is split on the top left corner? That is our problem with most of the keys on the keyboard. When pressed, the white plastic sleeve binds up on the outer key housing. The W keycap in this case seats inside the inner white sleeve so it pushes the walls of the inner sleeve outward making it bind up on the housing. It is this inner sleeve we will repair. As there is no good method of simply gluing the split sleeve back together, we will put a plastic collar around the inner white sleeve. The issue we face with this approach is twofold. First, we must maintain the inner sleeve downward keystroke. It is this inner sleeve that moves to provide electrical contact of the key. Second, the keystroke distance itself will be diminished by adding the collar, and it becomes critical to position the collar consistently across all of the keys to maintain a balanced typing experience.
Disassembly
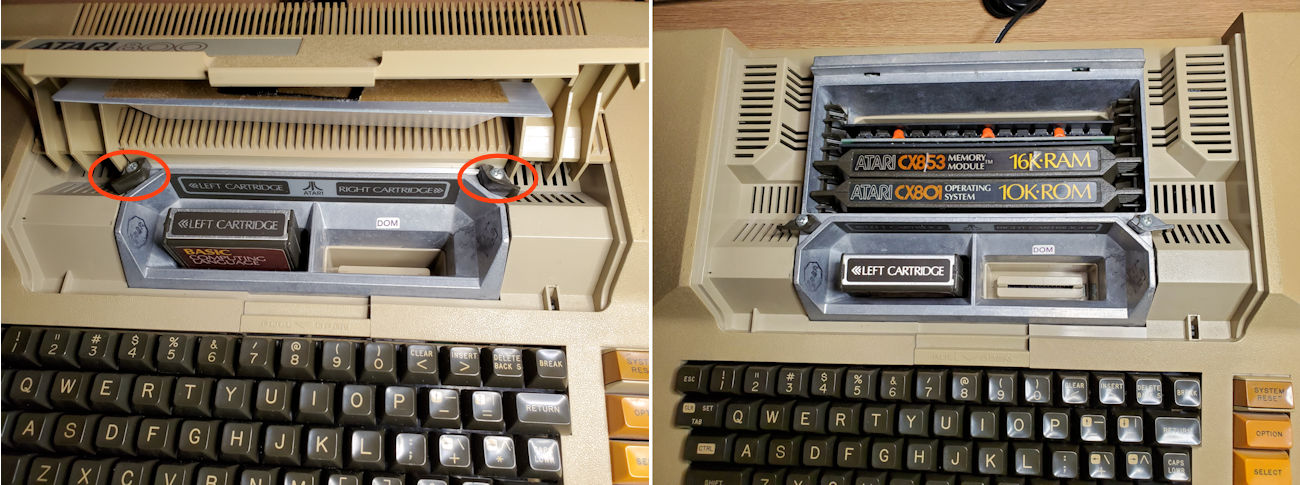
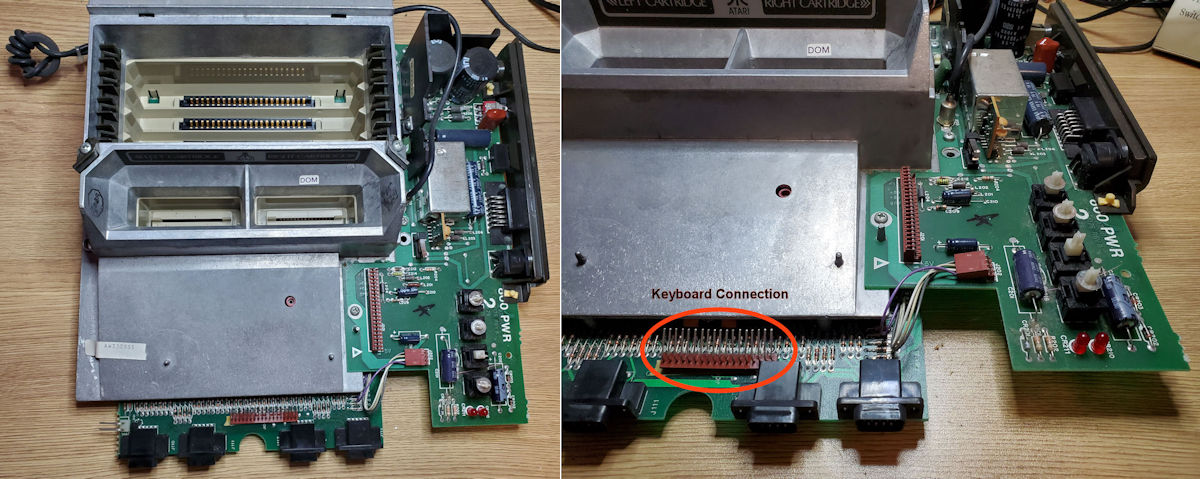
The first step we want to take is to open the cartridge door and unlatch the OS/RAM cover. Remove this and set aside. This exposes the OS/RAM cards which we also want to remove and set aside. While it is not necessary to remove the OS/RAM cards, I do it just to be safe from them falling out and being damaged.
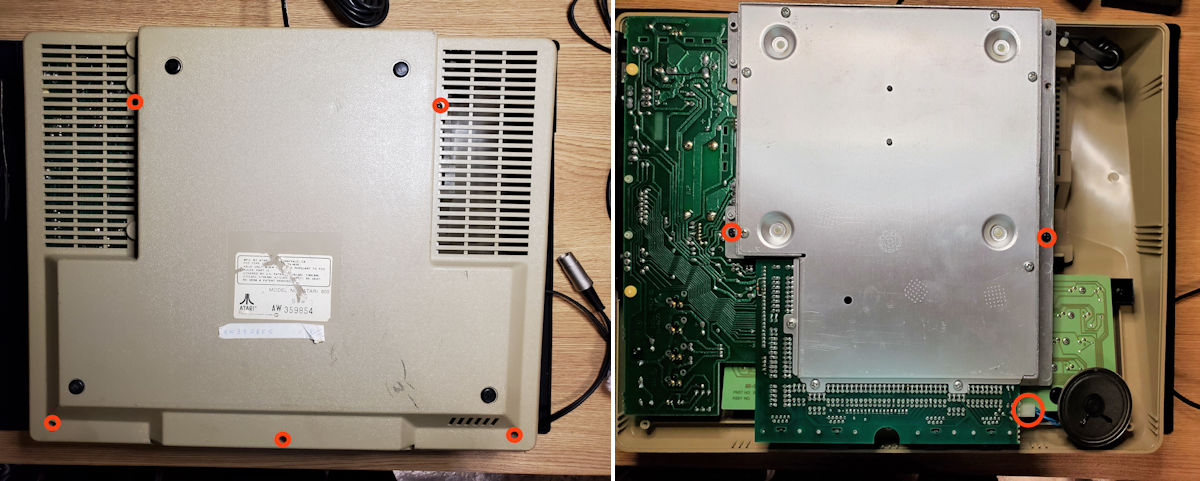
Remove the five screws from the bottom of the case to allow you lift the bottom case up and remove completely. As you will see the computer chassis is still secured to the case top by two additional screws to be removed.
While still having the bottom of the computer chassis exposed, unplug and remove the small speaker and set aside. At this point, you should remove the two screws noted in the photo and be able to lift the front of the chassis up enough to carefully disconnect the keyboard cable. Once disconnected you can carefully remove the computer chassis assembly. Note: You will need to remove the cartridge door assembly on the top of the case to be able to effectively lift the chassis assembly from the case top.
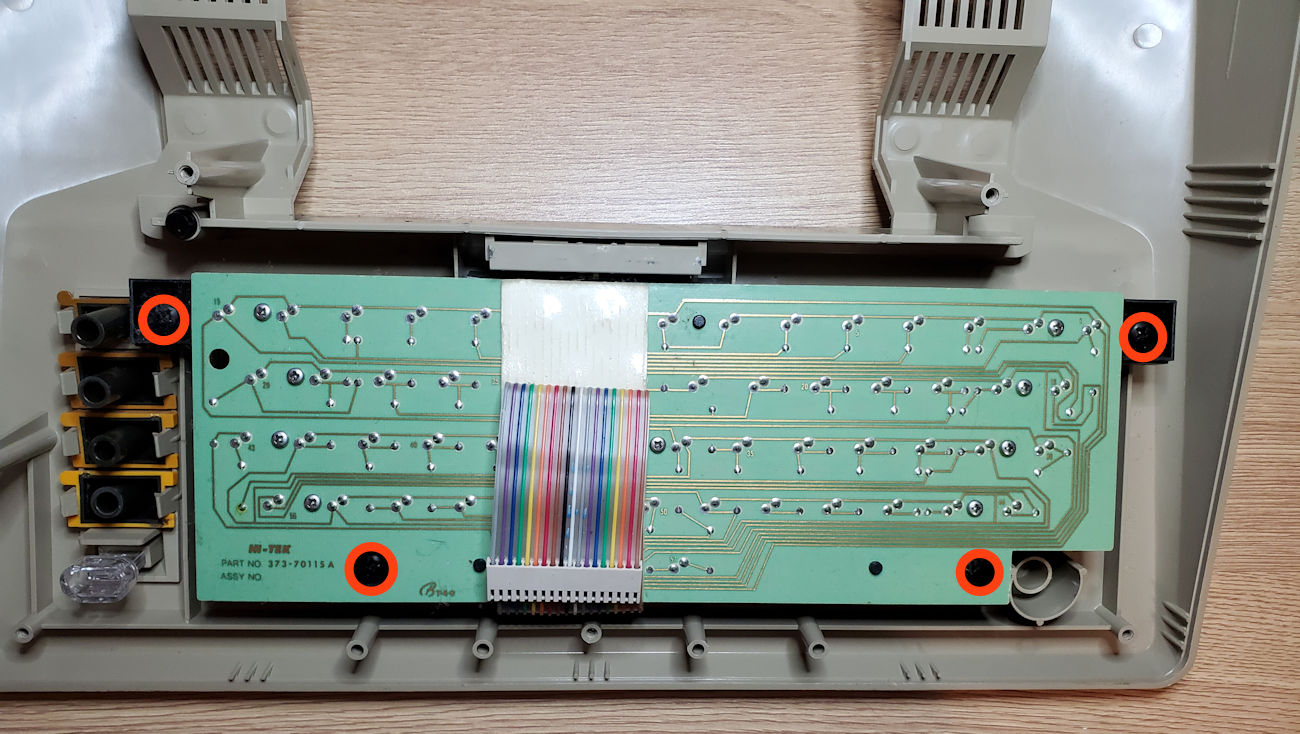
Our next step is to remove the keyboard from the top cover by removing the four screws attaching it in place. You can set the top cover aside once completed as we are just working on the keyboard itself.
Repair Work
Okay, now it is time to do the repair work that this project is all about, which is to install collars on the white inner key sleeves. This turned out to be tedious work. The installation of the collar on the key sleeve took upwards of three minutes per key even after practice. Some took much longer due to the exact tolerance of the collar dimensions. You don’t want to force fit the collar as it will break, but make a best effort to square up the key sleeve to its original configuration. This is much easier said than done.
The tools I ended up using for this project were a fine point angled tweezers which I used to provide the precision placement of the collars. Just needed that small fine point that my fingers just couldn't provide. A flat tipped tweezers which I used primarily to get a leveled position on the key sleeve once the collar was put in place. Angled needle nosed pliers as I needed something to grip the key sleeve in some cases with no other way to do it. And of course, the Bondic UV activated superglue which you can get from Amazon for about $15.

So, let’s get started.
I removed all the keycaps. Since I have them removed, I might as well wash them up to clean off forty years of debris deposited. They are just friction seated in the key sleeve. Also, before going further after test fitting a few collars, I cleaned up keyboard of any debris deposited from the past and gave it an alcohol rub down just to remove any other oil and grease deposits that may have been there.
So the next thing to do was attempt to install a few collars and work out my approach. It was a bit of a challenge to get the collar to slide over the key sleeve as it is a very tight fit. It is why on a few occasions I needed to use the pliers just to grip the key sleeve enough to get the collar in position. On other keys sleeves, I pressed into the sleeve with the point of my tweezers and positioned the collar with my fingers. Once I got the collars in place and positioned to look best, I took the UV superglue and applied it much like you would if caulking a window or bathtub. The glue remains liquid until you hit it with UV light and then hardens up. Below is a picture of my first run at this.
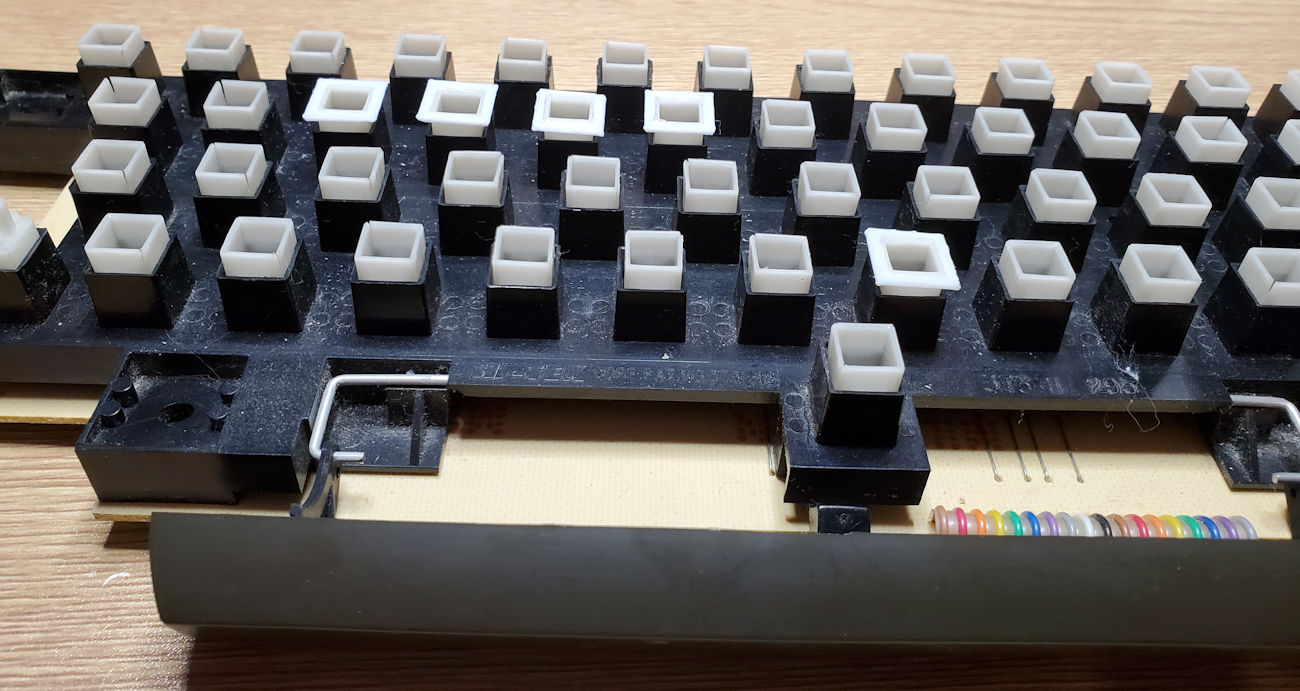
The above picture shows just how bad some of the sleeves have split. Not only does that facilitate keys sticking, but it is this sleeve that holds the keycap in place. And with this split the keys will pop out with little effort. The collar when properly placed restores the tight dimension providing the friction needed to keep the keycap seated.
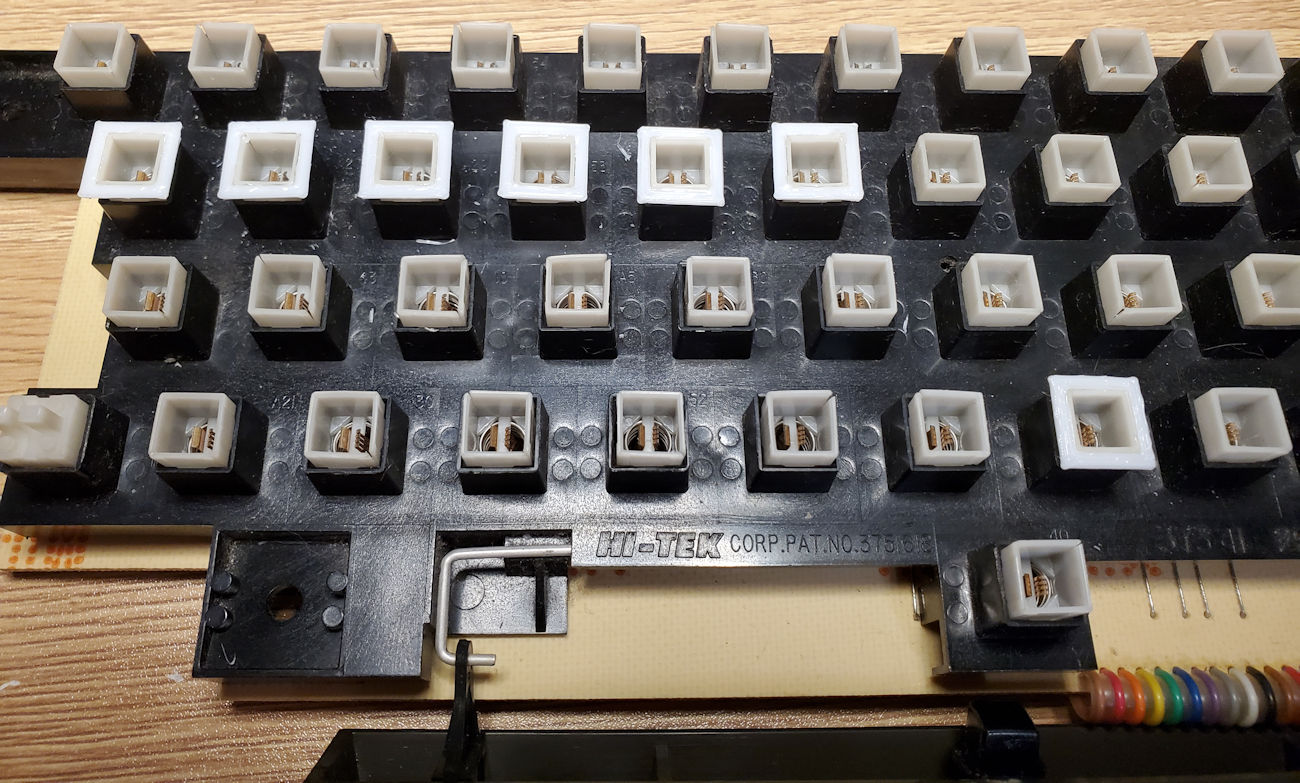
Just to do these seven collar installations in the above picture took over an hour as I worked out how I could best get the collar over the sleeve, leveled and positioned as close as possible to the top of the sleeve so that it provided sufficient keystroke distance to make the electrical contact when the key is pressed. Things moved a bit faster once I got the process I used worked out.

I worked on this over the course of three evenings and it ended up being about 4 hours work to complete the collar installation.
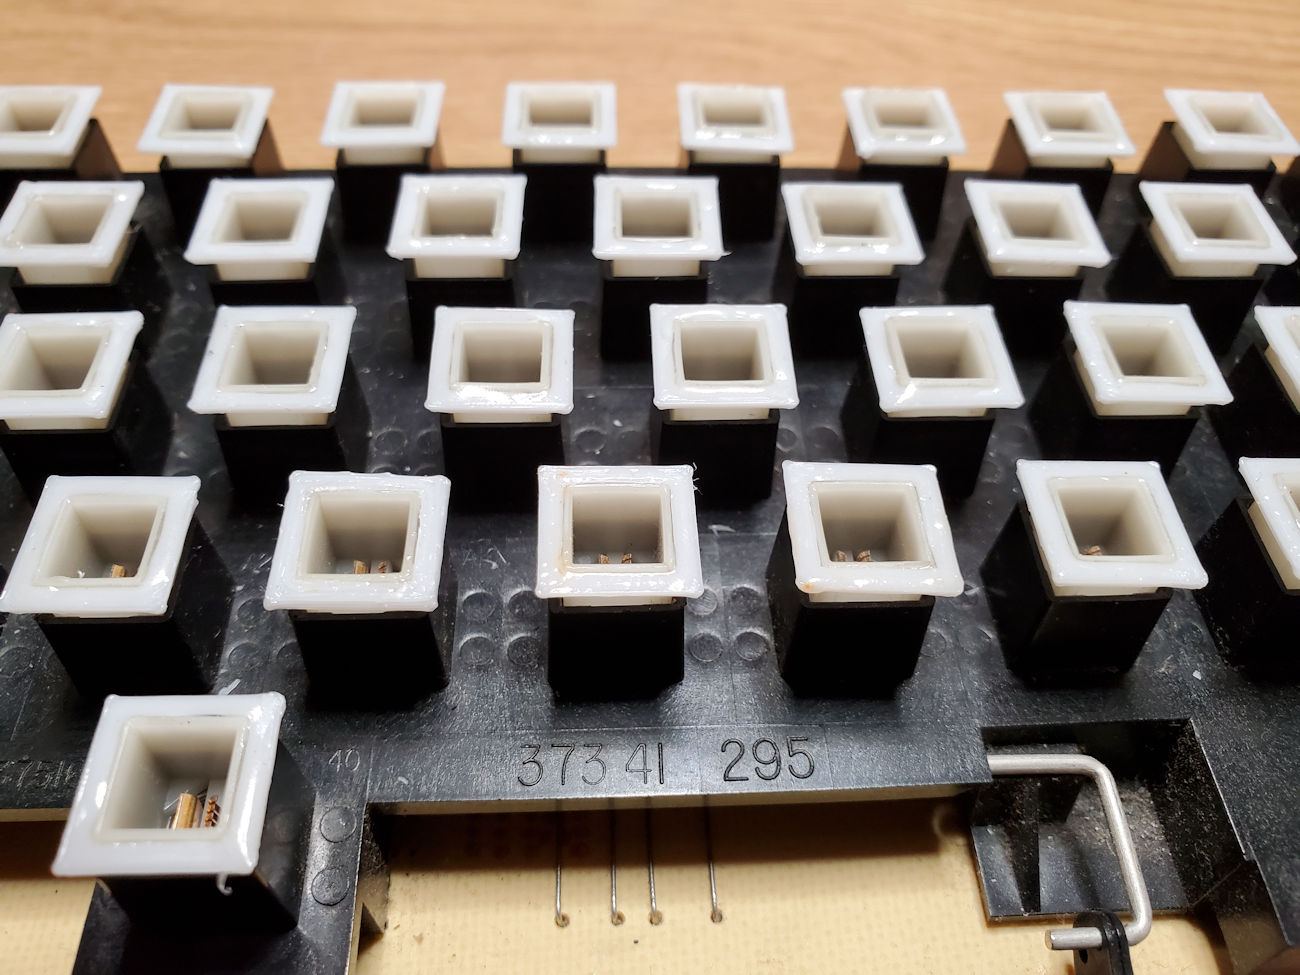
You can see in the above picture where the UV superglue is set. While the UV light will set this glue effectively in about 12-15 seconds per key, I generally walked the light around the key for about 30 seconds to ensure all the glue is activated.
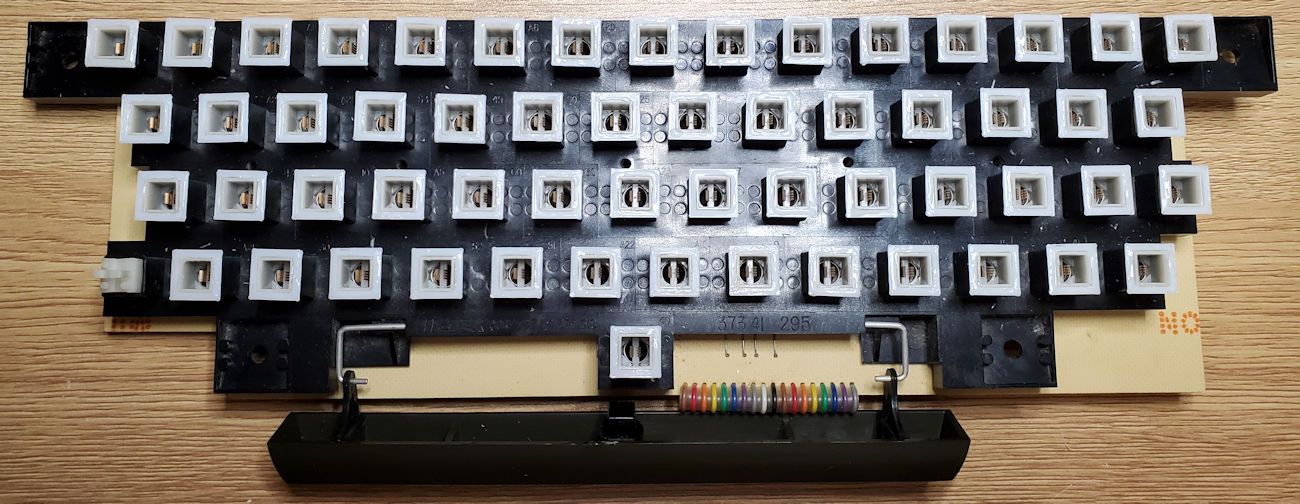
All key sleeves have been collared and I tested without the keycaps installed to validate connectivity before finishing up with putting the keycaps back in place.
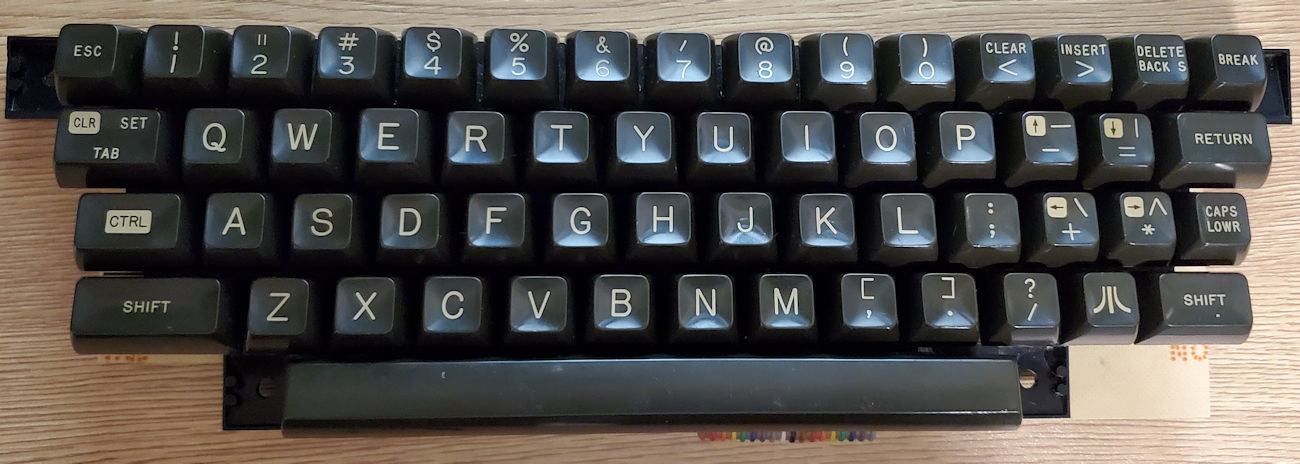
All keycaps installed and checked for proper function. No sticking keys!! And that was the goal of this project. Now to put everything back together and complete this project. Reassembly is the reverse of disassembly so I will not go into those steps here.
My Takeaways For This Project
- Plan on this type of project to take some time and don’t let it frustrate you. Getting the collar over the key sleeve is the most challenging. And once you get the collar over the key sleeve, plan time to position the collar to the optimum topmost point in the sleeve without it popping off. Yes, that happened regularly to me and I had to start the whole process over again.
- Taking from my first takeaway, it is critical that you position the collar as close as possible to the top of the sleeve while still providing a surface for the UV glue to adhere to when activated. If you position the collar too far down on the sleeve, you not only will have an inconsistent keystroke across the keys but may prevent the key from making the electrical contact needed to make it work.
- Working with the Bondic UV superglue worked well overall but as I used this glue, the tube started leaking from the tip when not needed. Gets a little messy as it has the consistency of honey. Since it does not harden unless you hit with UV light, will continue to be a bit sticky while in use.
- You do lose ever so little of the downstroke of key when the collar is in place. I doubt someone who had never used this keyboard would notice it, but as I like a long downstroke on my keyboard, it does stand out. Still, it works fine and does not impede its use, its just my preference.
